

Introduction:
After reading an article about travel routers the other day, I was tempted to pick one up. Then, I remembered I had an old HiWiFi HC5661 collecting dust in a drawer. It’s compact, runs on a standard 5V/1A Micro USB power supply, and is essentially the perfect candidate for a portable router. Time to dive back in and bring it back to life.
The Tinkering Process:
1. Bypassing the Developer Mode Restriction
According to the old official guides, you needed to install a developer plugin through the HiWiFi store. However, since the official plugin store is now defunct, we have to use an offline rooting method to gain shell access.
Steps:
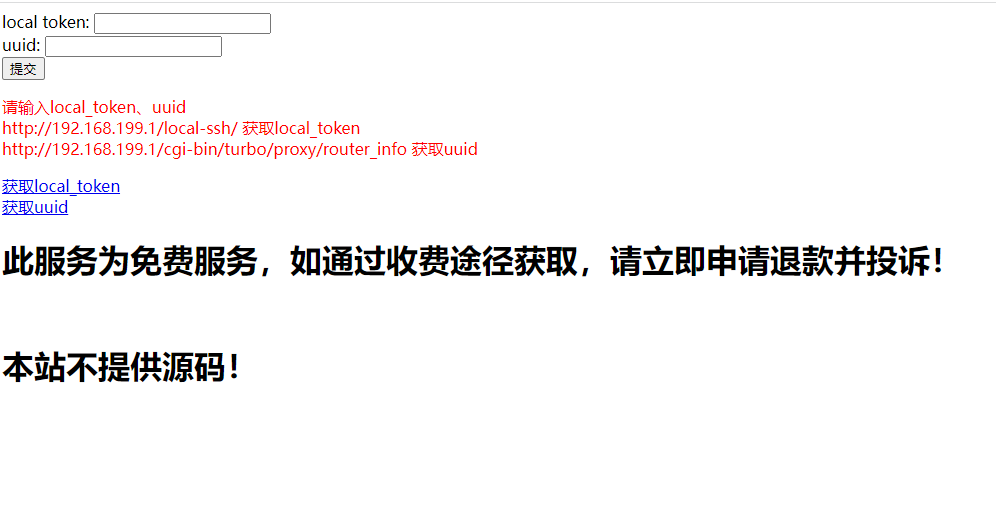
Visit: http://www.hiwifi.wtf/

1. Click 'Get local_token'
Keep this page open. You will need to enter the cloud token later to temporarily enable SSH.
Link for local_token: http://192.168.199.1/local-ssh/

2. Get the UUID
Link for UUID: http://192.168.199.1/cgi-bin/turbo/proxy/router_info
Look for the "uuid" field in the returned JSON data.

3. Return to http://www.hiwifi.wtf/
Enter the local token and UUID to generate your cloud token.

4. Go back to http://192.168.199.1/local-ssh/ and paste the cloud token.
Upon submission, you should see: Success: ssh port is 22

5. You can now SSH into the router (Username: root, Password: your admin password). Since this is only a temporary session, run this command to make the SSH access permanent:
/etc/init.d/dropbear enable && /etc/init.d/dropbear start
Once you have root access, you’re ready to flash the “immortal” Breed bootloader and custom firmware.
2. Flashing the Breed Bootloader
You’ll need an SSH client like PuTTY, a file transfer client like WinSCP, and the Breed uboot binary. (Download links are available at the bottom of the post.)
1. Open WinSCP, set the file protocol to SCP, connect to your router’s IP, and use your router credentials.
2. Navigate to the /tmp directory and upload the Breed file (breed-mt7620-hiwifi-hc5761.bin).
3. Use PuTTY to SSH into the router and execute the following command:
mtd -r write /tmp/breed-mt7620-hiwifi-hc5761.bin u-boot
4. The router will reboot, and you will have successfully installed the Breed bootloader.
3. Flashing Custom Firmware
1. Unplug the router. Use a pin to hold down the Reset button, plug in the power, and hold for about 5 seconds.
2. Ensure your connected computer is set to obtain an IP address automatically (DHCP).
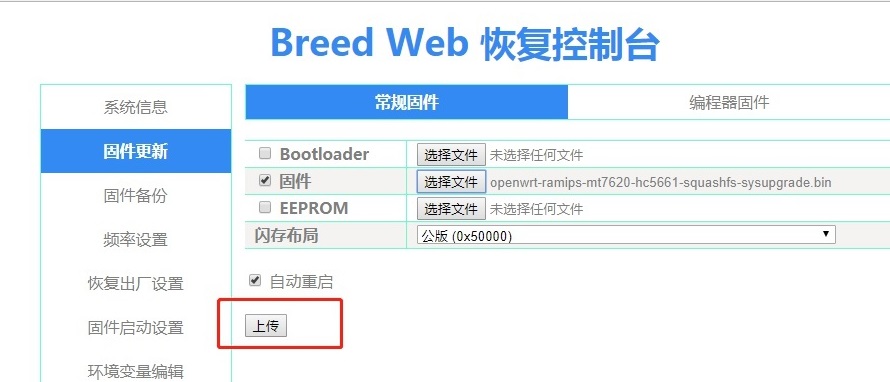
3. Open your browser and navigate to 192.168.1.1 to access the Breed web UI. Upload your preferred firmware (OpenWrt, Padavan, etc.) and flash it. Once complete, the router will reboot.
4. Conclusion
Check the links at the end of the post to download the firmware. I’ve included my current Padavan build, but with the Breed bootloader installed, you’re free to experiment with OpenWrt, iKuai, or any other compatible firmware you prefer.