

Introduction:
Stable Diffusion has become the gold standard for open-source AI image generation—it’s powerful, free, and produces stunning results (like the header image above). However, running it locally requires at least 6GB of VRAM. In this guide, we’ll show you how to bypass those hardware limitations by deploying Stable Diffusion on Google Colaboratory. This lets you tap into Google’s cloud GPUs, turning even your dusty old laptop—or even your phone—into a high-performance AI art station.
Follow these steps to get up and running, no complex coding required
1. Head over to the camenduru stable-diffusion-webui-colab repository. Scroll down until you see the list shown below. You’ll find various versions like “lite,” “stable,” and “latest”—I highly recommend sticking with the stable version for the best experience.
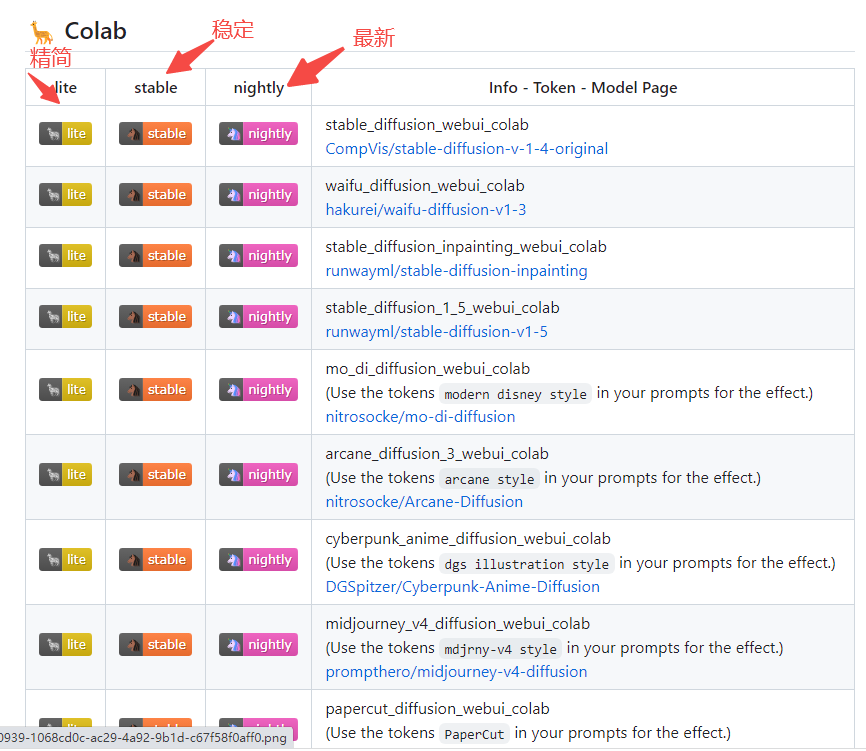
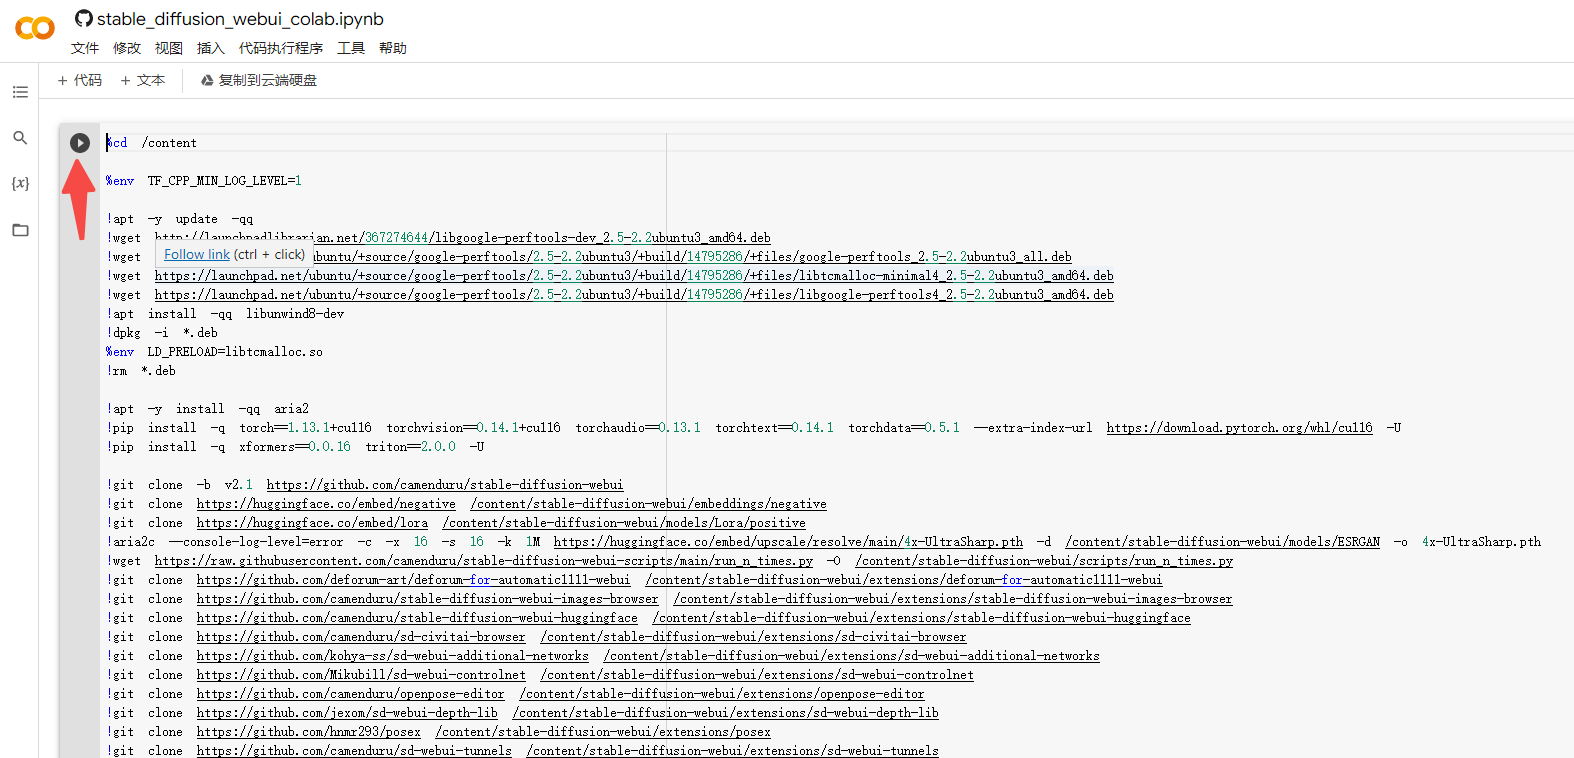
2. Let’s use the CompVis/stable-diffusion-v-1-4-original stable build as an example. Click “stable” to open the notebook. If you aren’t signed in, log into your Google account. You don’t need to change anything in the script; just hit the play button in the top-left corner. You might see a warning pop up—just select “Run anyway” to proceed.
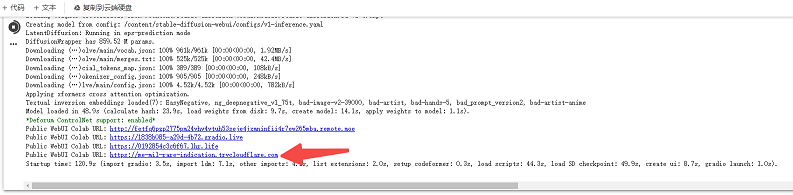
3. Let the script run—it usually takes about 8-10 minutes to install dependencies. Once you see the output shown below, you’re ready to go. Simply click the provided URL to launch the Stable Diffusion WebUI interface.
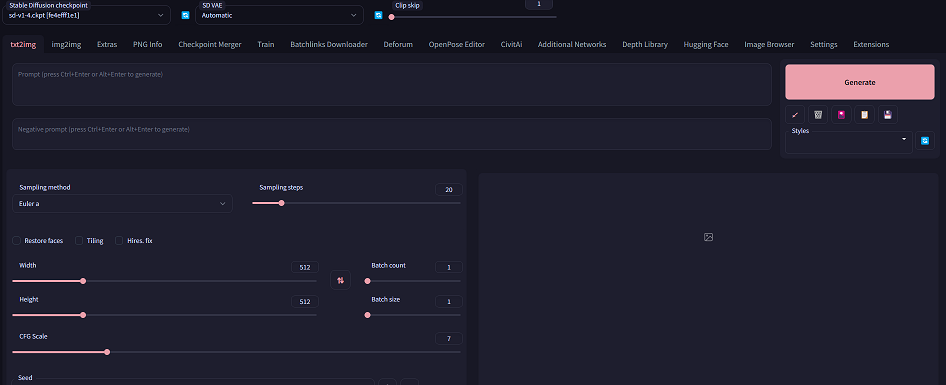
4. You’re all set to start generating! Keep in mind that as a free Google Colab user, your session is limited (usually to 12 hours) and will terminate after a while. It’s perfect for learning and experimenting, though perhaps not ideal for heavy, sustained production workloads.